
Crossroads Team Beacons Explained
How heal/recolor pads work in Classic BrickBattle — and why the second color ends so many lives.
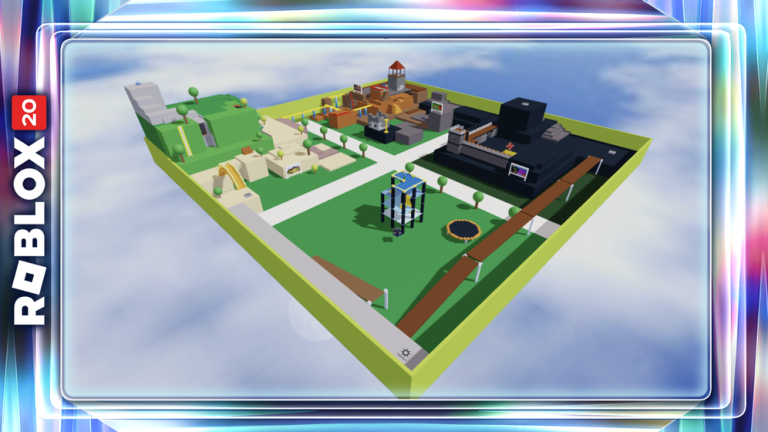
Beacons are the beginner trap
On Classic Crossroads (Place 1818), glowing team beacons look like friendly checkpoints. They can heal you and recolor your avatar’s team appearance. The match is still free-for-all — those colors are not permanent alliances. Touching a second beacon of a different color can kill you instantly. More Hunt tourists die to that second pad than to a fair Sword duel.
This guide expands the beacon section from Getting Started so you can farm KOs and finish Hunt Tower objectives without suiciding mid-route.
What a beacon does
| Interaction | Typical result |
|---|---|
| First beacon (or same color again) | Heal + adopt / refresh that team color |
| Second beacon, different color | Can kill you |
| Standing on “your” color while safe | Reset HP before re-peeking a fight |
| Ignoring beacons entirely | Valid — but you miss free heals |
Exact VFX and pad art can vary with classic lighting, but the second-different-color rule is the one every BrickBattle guide repeats. When in doubt: one color per life unless you deliberately respawn.
Free-for-all means colors are costumes
Seeing two green players does not mean they are teammates. Either can rocket you. Beacons exist as a heal/identity toy from classic BrickBattle design, not as a squad system. Play every other human as an enemy — including someone who just shared your pad.
That mindset pairs with the Players Hub: Rocket Mains and Hybrids use beacons as pit stops, not as social clubs.
Practical heal loop
- Take a fight near Castle, Temple, Den, or Tower (Map guide).
- When low, disengage instead of ego-challenging.
- Path to the beacon color you already wear.
- Heal, re-arm with Rocket / Superball / Sword, re-enter.
- Never “tour” pads while rotating unless you accept a possible death.
During crowded The Hunt: Roblox 20 weeks, pads become traffic jams. Wait a beat so you are not splash-deleted mid-heal, then leave. Empty yards waste KO time; contested beacons waste lives.
How Hunt tourists die on beacons
Hunt players arrive from the hub after badge scavenging and sprint for Place 1818 KOs. They treat every glow as a checkpoint from modern obbies. Pattern:
- Touch blue → healed, now blue.
- Run toward a fight past red → touch red → dead.
- Blame “lag,” rejoin, repeat.
Fix: read this page once, pick a color for the life, and only change colors if you want a reset death. For Tower hat progress, a beacon suicide does not help your KO counter — it only slows the stage.
Beacons by map quarter (habits)
You do not need a pad spreadsheet; you need habits per quarter:
Blackrock Castle
Bridges and battlements funnel fights. Heal before peeking the bridge, not on the bridge under rocket spam. Same-color returns after splash exchanges keep Rocket Mains alive.
Thieves’ Den
Tight interiors punish greed. If you leave Den low, heal on your color outside the hottest doorway when possible, then re-enter with Sword ready (Weapons).
Lost Temple
Stairs create vertical chases. Commit to a color at the base or overlook you actually control. Mid-stair beacon tourism is how third parties steal both your HP and your dignity.
Tower (trampoline)
Vertical chaos already kills enough players. Do not add a color swap after a bad landing. Heal, then fight the landing zones for KOs rather than the apex.
Using beacons without throwing fights
- Pre-heal before you take height with Superball or Rocket.
- Post-heal after a won duel if another fighter is rotating in.
- Skip heal if the only pad en route is the wrong color and a weapon spawn is closer to a safer same-color pad.
- Never AFK on a beacon — you are a free Superball target.
Builders placing Trowel cover near pads should still treat the area as FFA. Cover is temporary; splash deletes camps.
Beacons vs Hunt checklist priorities
Order of operations for Hunt week:
- Builderman + hub badges in the Hunt hub.
- Enter Classic Crossroads.
- Survive beacons long enough to secure KOs (majority 3; some guides 4 — trust UI).
- Claim Tower hat / badge when the stage completes.
Beacon mastery is step-zero survival so step-three farming works. Pair with Controls so tool swaps stay clean after a heal.
Related reading
- Getting Started — full beginner loop
- Map guide — where pads meet fight routes
- How to get KOs — what to do with the HP you just recovered
- Classic vs Corrupted — if you joined the wrong Crossroads entirely
- Codes — beacons are not redeem codes
Master one color per life and Crossroads immediately feels fairer. The map stops “randomly” killing you, and your deaths start teaching rocket angles instead of glowing-pad lessons.
Frequently Asked Questions
Quick answers to the most common questions.
Can a beacon kill me?
Yes. Touching a second beacon of a different color can kill you. Heal on your current color.
Do beacons make teammates?
No. They heal and recolor, but Crossroads stays free-for-all. Same-color players can still eliminate you.
Should Hunt players use beacons?
Yes for heals — carefully. Wrong-color pads waste the KO time you need for the Tower stage.
Is it safe to touch every beacon while exploring?
No. Touring every pad is the fastest way to suicide. Pick one color per life unless you accept a reset.
Where do I learn map routes around pads?
Use the Map guide for Castle, Den, Temple, and Tower callouts, then return here for heal discipline.